I sat there for about ten minutes just staring at a black screen. Sound was coming through fine — I could hear the whole show playing — but the display was completely dark. Not dim. Not flickering. Just nothing. My first instinct was to assume the panel had died and start looking at replacement prices. Turns out, I was maybe thirty minutes and a flashlight away from figuring out what was actually wrong.
That one experience completely changed how I approach TV problems.
Before You Touch Anything, Try the Obvious Stuff
Most people skip this because it feels embarrassingly simple, but a surprising number of what look like serious hardware failures are actually software states gone wrong. Unplug the TV completely — not standby, not the remote power button, actually pull the cord — and leave it unplugged for two to three minutes. This clears temporary memory that can cause frozen screens, audio glitches, and even simulate what looks like a backlight failure.
If that does nothing, go into the settings and run a factory reset. It sounds nuclear, but it changes nothing physical. What it does is wipe corrupted cached data, kill background processes that have been quietly eating resources for months, and sometimes restore a TV that’s been dragging for so long you’d forgotten what it felt like when it was new. In my experience, a solid third of “my TV is dying” complaints end right here.
One more thing — switch from 2.4 GHz Wi-Fi to 5 GHz, or better, run an Ethernet cable directly to the TV. Network lag gets blamed on TV hardware way more often than it should.
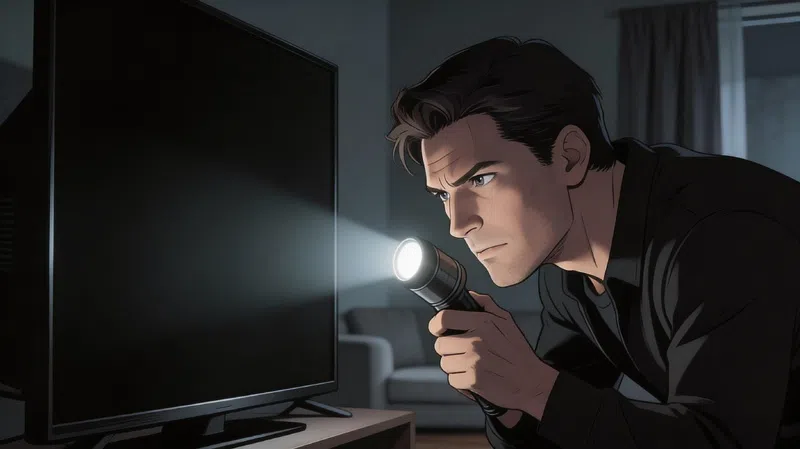
The Flashlight Test and What It’s Actually Telling You
When There’s Sound but No Picture
This specific combination — audio working perfectly, no image at all — almost always points to a backlight failure rather than a dead panel. The display itself is probably fine. What’s failed is the LED strip (or strips) behind it that provide the illumination.
Here’s the test: get your TV on, grab the brightest flashlight you own, and press it directly against the screen at a slight angle. If you can make out a faint, dim version of whatever’s playing underneath — menus, a cursor, anything — the panel is alive. The backlight is the problem.
This distinction matters enormously for repair decisions. A panel replacement typically costs between 60% and 80% of a comparable new television, which almost never makes financial sense on a unit older than four or five years. A backlight strip replacement is a completely different conversation.
Why Backlights Fail
Honestly? Usually just age and voltage stress. The LED strips in most televisions run at 15 to 20 volts and are wired in series — meaning one burned-out LED can take the entire strip offline. Add humidity, consistent heat, or a home without proper surge protection, and you accelerate that process faster than the warranty period ever suggests.
| Symptom | What It Likely Means |
|---|---|
| No picture, but sound works fine | Full backlight failure — LEDs or driver board |
| Screen very dim even at max brightness | Degrading LED strips or power supply issue |
| Flickering screen, especially when cold | Failing LEDs or loose internal ribbon cable |
| Dark patches or uneven glow | Burned-out individual LEDs or shifted strips |
| Screen works, then goes black after 10–15 minutes | Thermal shutdown — heat is the cause |
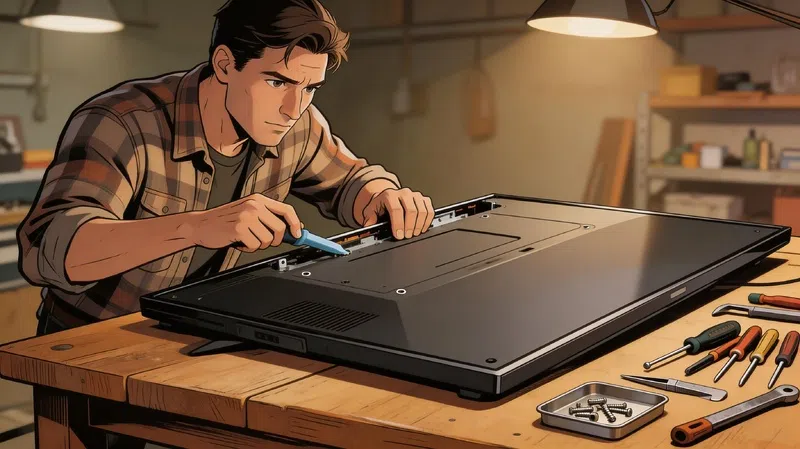
Replacing a single faulty strip isn’t a complex repair if you’re comfortable removing the back panel and working with a multimeter. It can extend the TV’s life by two to four years for a relatively modest cost, and the process is well-documented for most common models on iFixit’s TV repair section.
The Slow TV Problem Is Probably Not the Hardware
Your Processor Just Can’t Keep Up Anymore
Smart TVs age in ways that are invisible until suddenly they’re not. The processor that was adequate when the TV launched in 2019 or 2020 is now running app versions built for 2024 hardware. YouTube alone has gotten noticeably heavier over the past few years. I used to think firmware updates would fix this. They don’t — and honestly, sometimes they make it worse.
The TV isn’t broken. It’s just underpowered for what modern apps demand from it.
What Actually Helps
Before spending anything on hardware diagnostics, work through this sequence:
- Clear individual app caches from the system settings menu — not just closing apps, but clearing stored data
- Uninstall anything you haven’t used in months — internal storage on older TVs is far more limited than people realize
- Turn off automatic background updates — let updates happen when you choose, not whenever the TV decides
- Factory reset as a last resort — yes, you’ll log back into everything, but the difference can be significant
If the TV is still sluggish after all of that, the most cost-effective solution by a wide margin is an external streaming device. Something with a modern processor — Roku’s current lineup is a reasonable starting point — loads apps faster than most televisions made before 2022, costs less than a single repair call-out, and essentially turns the TV’s display into a dumb screen that gets all its intelligence from a device that can actually be upgraded later.
Other Hardware Failures Worth Understanding
T-Con Board Problems
The T-Con board controls the timing signals for how pixels display information. When it starts failing, you’ll typically see vertical or horizontal lines across the screen, colors that look wrong in specific zones, or the picture freezing while audio keeps playing. The good news is that T-Con boards are relatively inexpensive, and a lot of apparent failures are actually just oxidized ribbon cables that need cleaning and reseating rather than full replacement. Worth checking before ordering a new board.
Power Supply Board
If the TV won’t turn on at all — no standby light, no response to the remote, nothing — the power supply board is usually the first place to look. This board converts wall power to the internal voltages the TV needs. Swollen or bulging capacitors are often visible with the back panel removed and are a clear sign the board needs replacing. This is generally one of the more straightforward and cost-effective repairs for someone comfortable working with electronics.
Panel Damage
There’s not a lot of nuance here. If the screen has a crack, ink-like black patches spreading outward from a point of impact, or permanent colored lines that don’t change regardless of what’s displayed — the panel is physically damaged. Panel replacements cost between 60% and 80% of a new equivalent TV. On any unit more than five years old, that math almost never favors repair. RTINGS.com is useful here for comparing whether a replacement would genuinely be a meaningful upgrade, or just sideways.
The Repair vs. Replace Question
People who work on TVs professionally tend to use a fairly simple threshold for this, and after looking at enough real-world cases, it holds up reasonably well:
| Repair Cost vs. New TV Price | What Most Technicians Recommend |
|---|---|
| Under 30% | Repair — almost always the right call |
| 30% to 50% | Depends heavily on the specific fault and the model |
| Over 50% | Replace — the economics don’t support repair |
The important caveat is that this assumes the display panel is undamaged. A TV with a perfect panel but a failed backlight or dead power board is absolutely worth repairing. A TV with panel damage almost never is — and recognizing that distinction upfront saves a lot of time and money chasing the wrong solution.
Preventing This Next Time
Use a surge protector rated for at least 1,000 joules. Most homes absorb constant small voltage fluctuations that accumulate damage over years, and most people have no idea this is happening. Wirecutter’s surge protector coverage is solid if you want specifics on what to look for.
Keep the TV in a room below 85°F if you can manage it, and away from direct sunlight. Dust the ventilation ports every few months with compressed air or a microfiber cloth — heat trapped by dust buildup is one of the most consistent causes of premature component failure, and it’s entirely preventable. Drop the brightness setting to around 250 nits for normal daytime viewing. For OLED owners specifically, make sure Pixel Shift and any logo dimming features are active. Burn-in is permanent. Energy Star’s TV usage guidelines go into useful detail on power habits that legitimately extend component life.
The gap between a TV that lasts seven years and one that lasts twelve is mostly just whether anyone paid attention to these things. It’s not complicated — it’s just not something most people think about until something stops working.